


While I was working with a contact form in HTML, CSS, and JavaScript, I was not able to send or receive emails from the form.

I always used to get the above error. To resolve this, I have done a lot of research on YouTube and Google but have failed to find a proper solution that could help me get rid of this error. There are no such websites, blogs, or videos that give full solutions to this problem.
After a long period of research. I got to know about the actual error, so the error was not about the port. It was about the username and password not being authenticated, and SMTP was not able to get that.
At that time, I thought I should write a proper blog on this topic so that people could get a full, proper solution in one blog.
So here I am with a full solution to the problem. Give it a read.

What is SMTP?
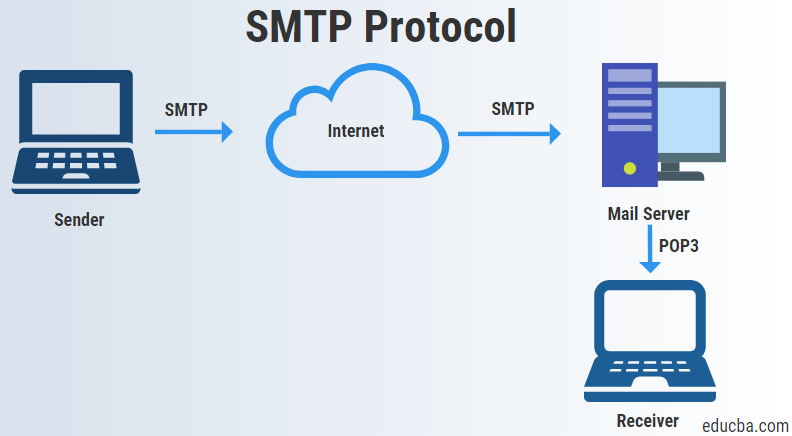
SMTP stands for Simple Mail Transfer Protocol. It is a TCP/Ip protocol used in sending and receiving emails.
An SMTP server is an application or computer that sends and receives emails. These servers typically use Tcp on port 25 or 587.
SMTP servers are set to an always-on listening mode and as soon as a server detects a TCP connection from a client, the SMTP process initiates a connection to port 25 to send emails.
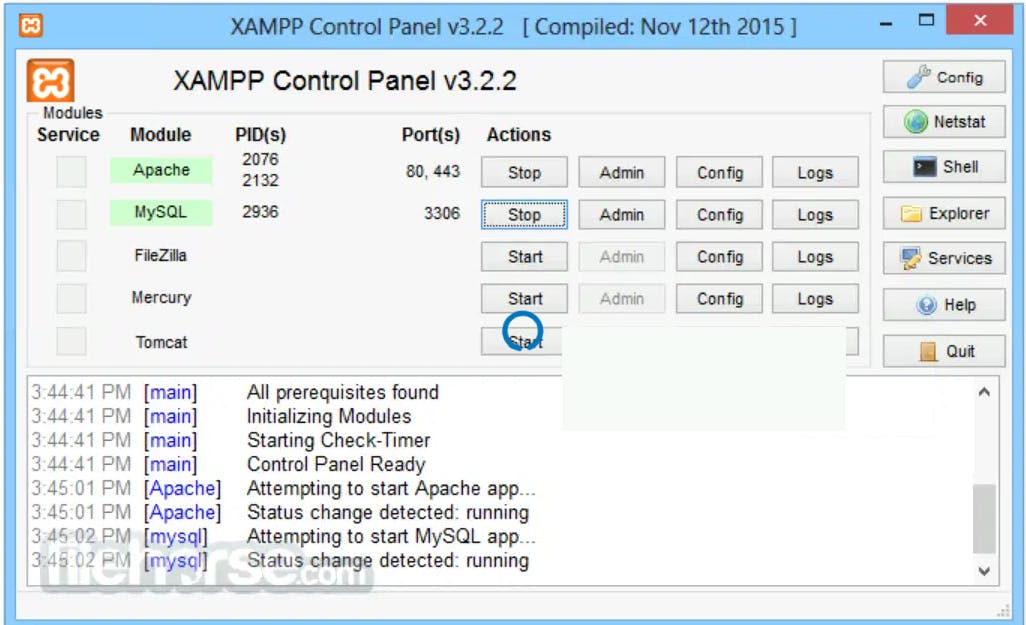
What is XAMpp?
XAMPP is a free and open-source cross-platform web server solution stack package developed by Apache Freinds, consisting mainly of the Apache HTTP server, MariaDB database, and interpreters for scripts when in the php and Perl programming Languages.
You can download it from https://www.apachefriends.org/download.html
Once Installed start the below services.
How To Connect SMTP To Xampp?
Here is a Required Solution:
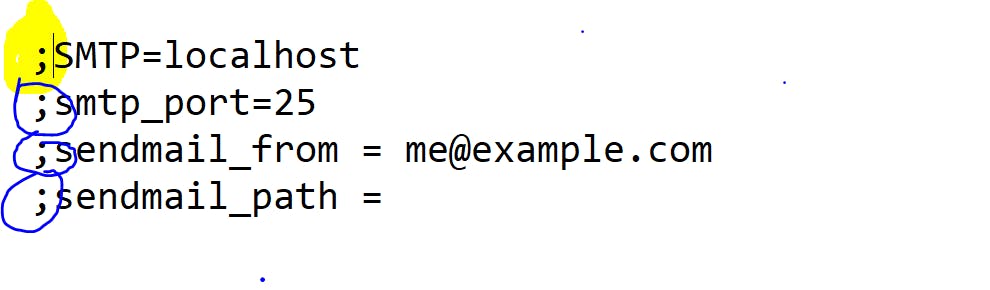
Step 1: Go to C:\Xampp\php\php.ini file, Search for Smtp and make the following change as shown.
Add ; [comment all the below lines in php.ini].
Step 2: Go to C:\Xampp\sendmail\sendmail.ini file, and make the following changes as shown.

step 3. Once you're done with the following changes try sending an email. There is a possibility of getting another error as the username password not accepting/not authenticated.
Follow the below steps if you get this error:
a. Go to your Gmail Account -> Setting
b. Go to Security -> Signing in to Google
c. Turn on the 2 Step verification as shown:

d. Once it is Enabled you will be able to see the App Password option open that and create a dummy app password as shown and click on Generate.
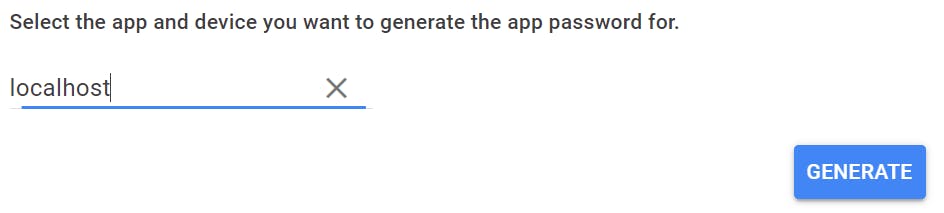
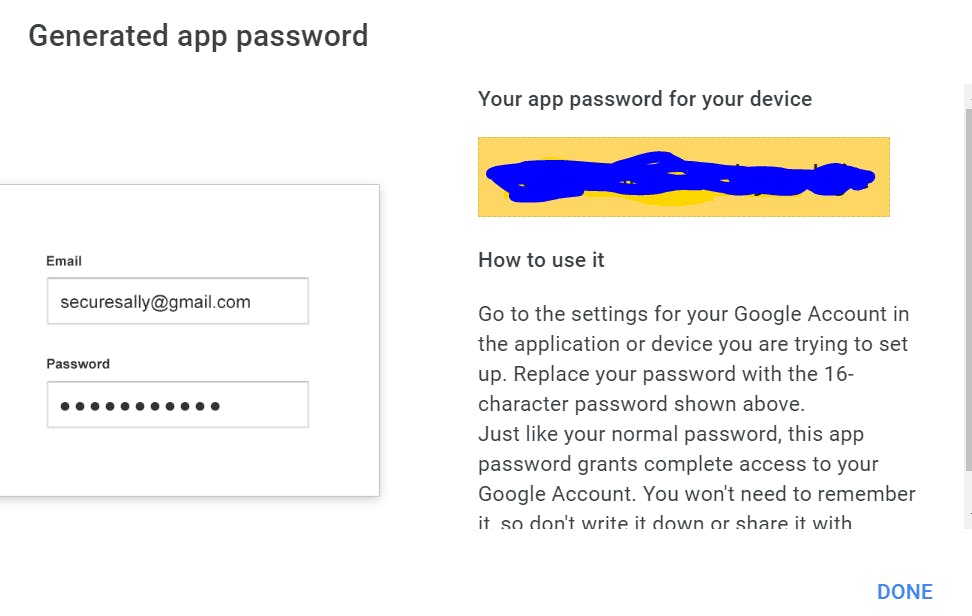
Use generate password in the sendmail.ini file.
Feel free to write a comment below or ping me on LinkedIn.
Thank you For Reading.